Part 2: Deploy a contract using Shipyard
In this section, you'll use Shipyard, an OpenSea-developed helper library for NFT-related use cases. It can be used as a starting point or a toolkit in a variety of circumstances.
Set up your project
Before deploying your new contract, open a terminal window and run the following commands to set up your project.
Create a directory and cd into it:
mkdir nft-tutorial && cd nft-tutorialInstall the foundryup up command and run it, which in turn installs forge, cast, anvil, and chisel:
curl -L https://foundry.paradigm.xyz | bashFollow the onscreen instructions output by the previous command to make Foundryup available in your CLI (or else restart your CLI).
Install forge, cast, anvil, and chisel by running:
foundryupCreate a new Foundry project based on Shipyard, which also initializes a new git repository, in the working directory.
forge init --template projectopensea/shipyardInstall dependencies and compile the contracts:
forge buildDeploy your first contract
First, you'll need to get your account primary key from the OpenSea website.
- Go to the OpenSea website
- Open up your Wallet tab
- Click "Settings", then "Export private key"
- Go through the authentication steps, and copy your private key
Next, you'll need to set two environment variables (make sure to swap in the appropriate value for <your_pk>):
export BASE_RPC_URL='https://mainnet.base.org' &&
export WALLET_PRIVATE_KEY='<your_pk>'
NOTE: Please do not share your WALLET_PRIVATE_KEY with anyone. If this key is compromised, an attacker can take control over any NFTs or smart contracts you own on any chain.
Run the script that deploys the example contract:
forge script script/Deploy.s.sol --private-key $WALLET_PRIVATE_KEY --rpc-url $BASE_RPC_URL --broadcastThe script will output something similar to the following:
## Setting up 1 EVM.

==========================

Chain 8453

Estimated gas price: 88.766056168 gwei

Estimated total gas used for script: 7367397

Estimated amount required: 0.653974775913954696 ETH

.....

##
Waiting for receipts.
⠉ [00:00:13] [####################################################################################################] 1/1 receipts (0.0s)
##### base
✅  [Success]Hash: 0x453027c738fe082c224e47fe8a0cb021753cd9deaf63b83acc345f9cf4b52980
Contract Address: 0x345f5559A6FCF7A3f577910DB5f647b2f34FbB91
Block: 5061169
Paid: 0.322121247965804442 ETH (5668977 gas * 56.821759546 gwei)

==========================

ONCHAIN EXECUTION COMPLETE & SUCCESSFUL.
Total Paid: 0.322121247965804442 ETH (5668977 gas * avg 56.821759546 gwei)

...
You've just deployed your first ERC-721 smart contract to the Ethereum blockchain. In this sample run, the address of the contract is 0x345f5559A6FCF7A3f577910DB5f647b2f34FbB91. Now check Etherscan (a block explorer) to confirm that the contract exists and then verify it.
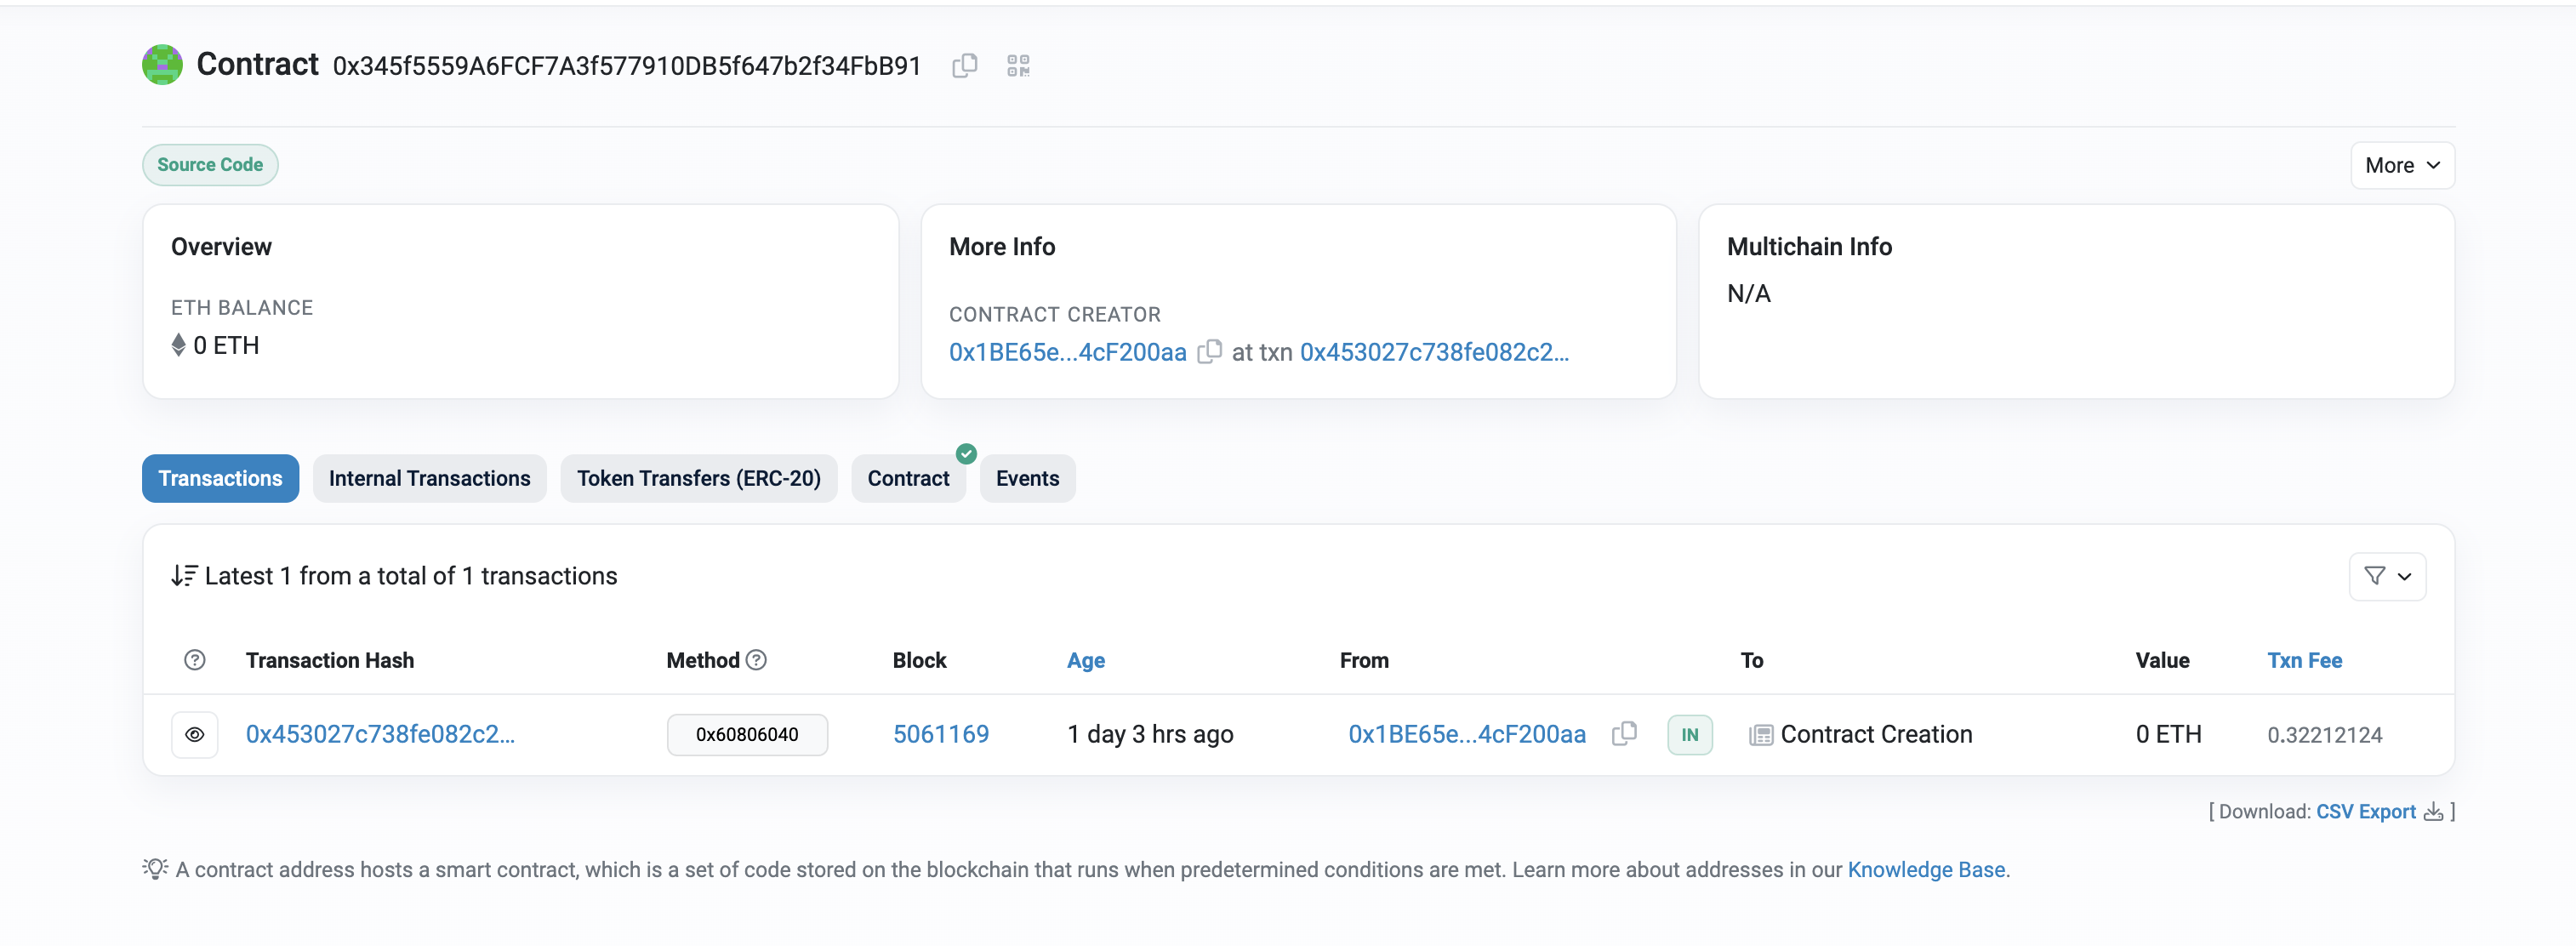
View the contract on Etherscan
Etherscan is a block explorer, a source of truth for you to view transactions (such as a contract deployment) on the Ethereum network. Check that the contract exists and was picked up by Etherscan:
- Go to the Basescan website
- In the main search bar, paste the contract address from your script output
You'll see something like the picture below, except under "Contract", you won't see the green checkmark yet.
Verify the contract on Etherscan
Verifying the contract means uploading your source contract code and ensuring that it matches the bytecode deployed on the blockchain. You want to do this because it makes it easy for anyone else to view your smart contract code and interact with it. It also provides people a way to verify its security and authenticity.
First, you'll need an Etherscan API key. Go to the mainnet Etherscan page and create an account. Under "My Profile", you'll see a tab to create an API key. Next, set the environment variable as follows:
export ETHERSCAN_API_KEY=<your_etherscan_key>Next, you'll run a command to verify the contract.
forge verify-contract <contract_address> Dockmaster --watch --constructor-args $(cast abi-encode "constructor(string,string,address)" "Dockmaster NFT" "DM" "0x0000000000000000000000000000000000000000") --chain 11155111If it works, you'll see a similar output. Go back to the contract on Etherscan. Now you'll see that the "Contract" tab has the green check mark. You'll also be able to see the contract code that you just deployed and interact with it via the Etherscan UI.
See subsequent sections for next steps: minting the first NFT from the contract and viewing it on OpenSea.
Updated 6 days ago